Mason Recreation

Diary of a Fit Patriot: Zumba®

24799015166_3f43cba18e_kBy Alison M. Hall

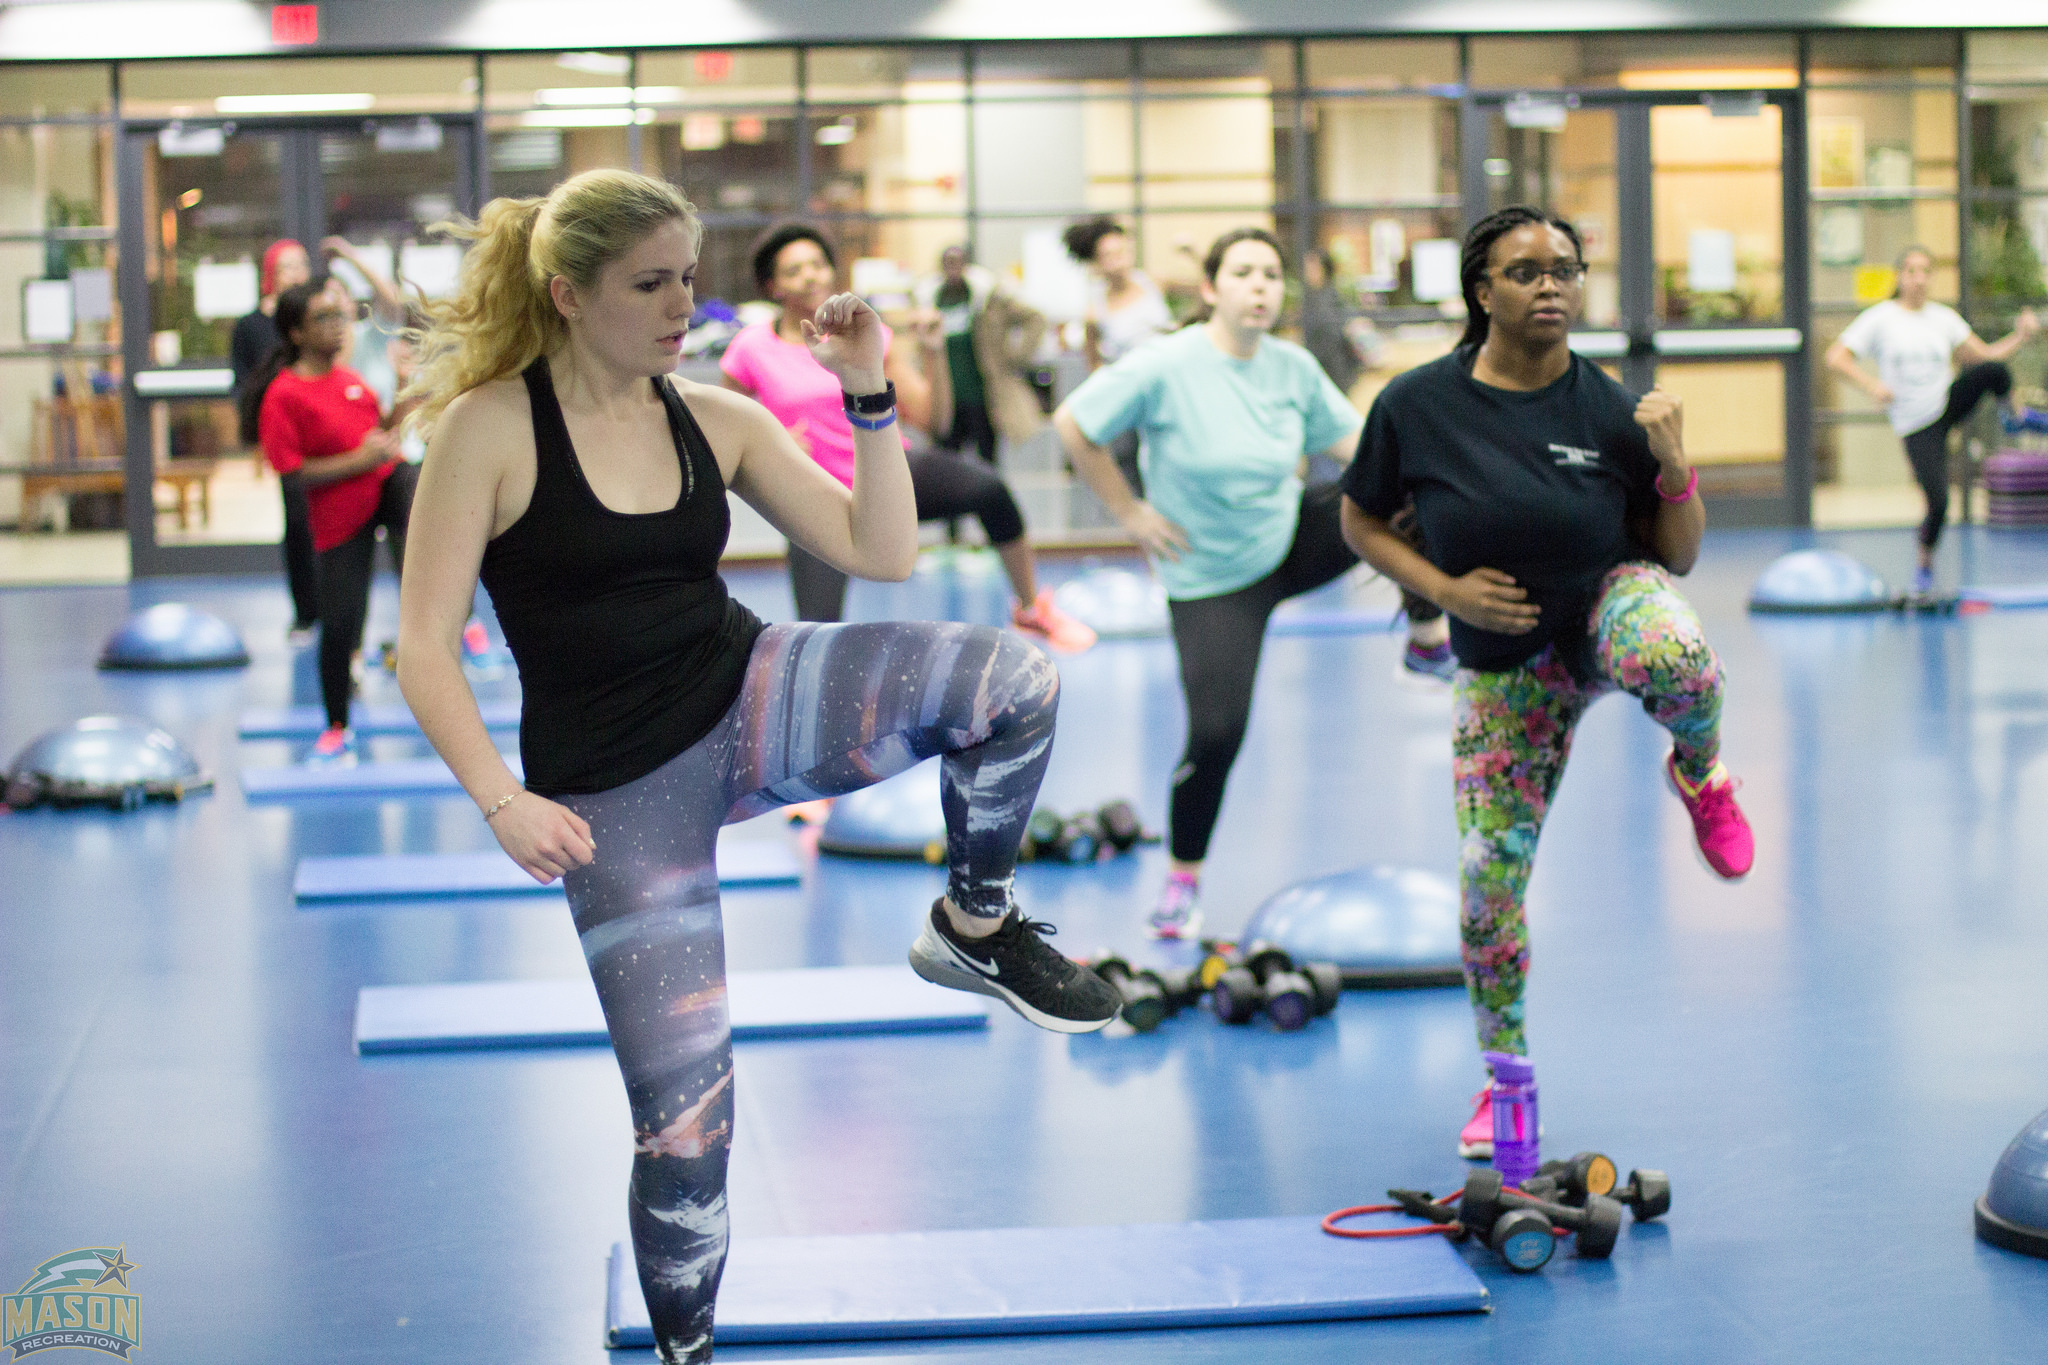
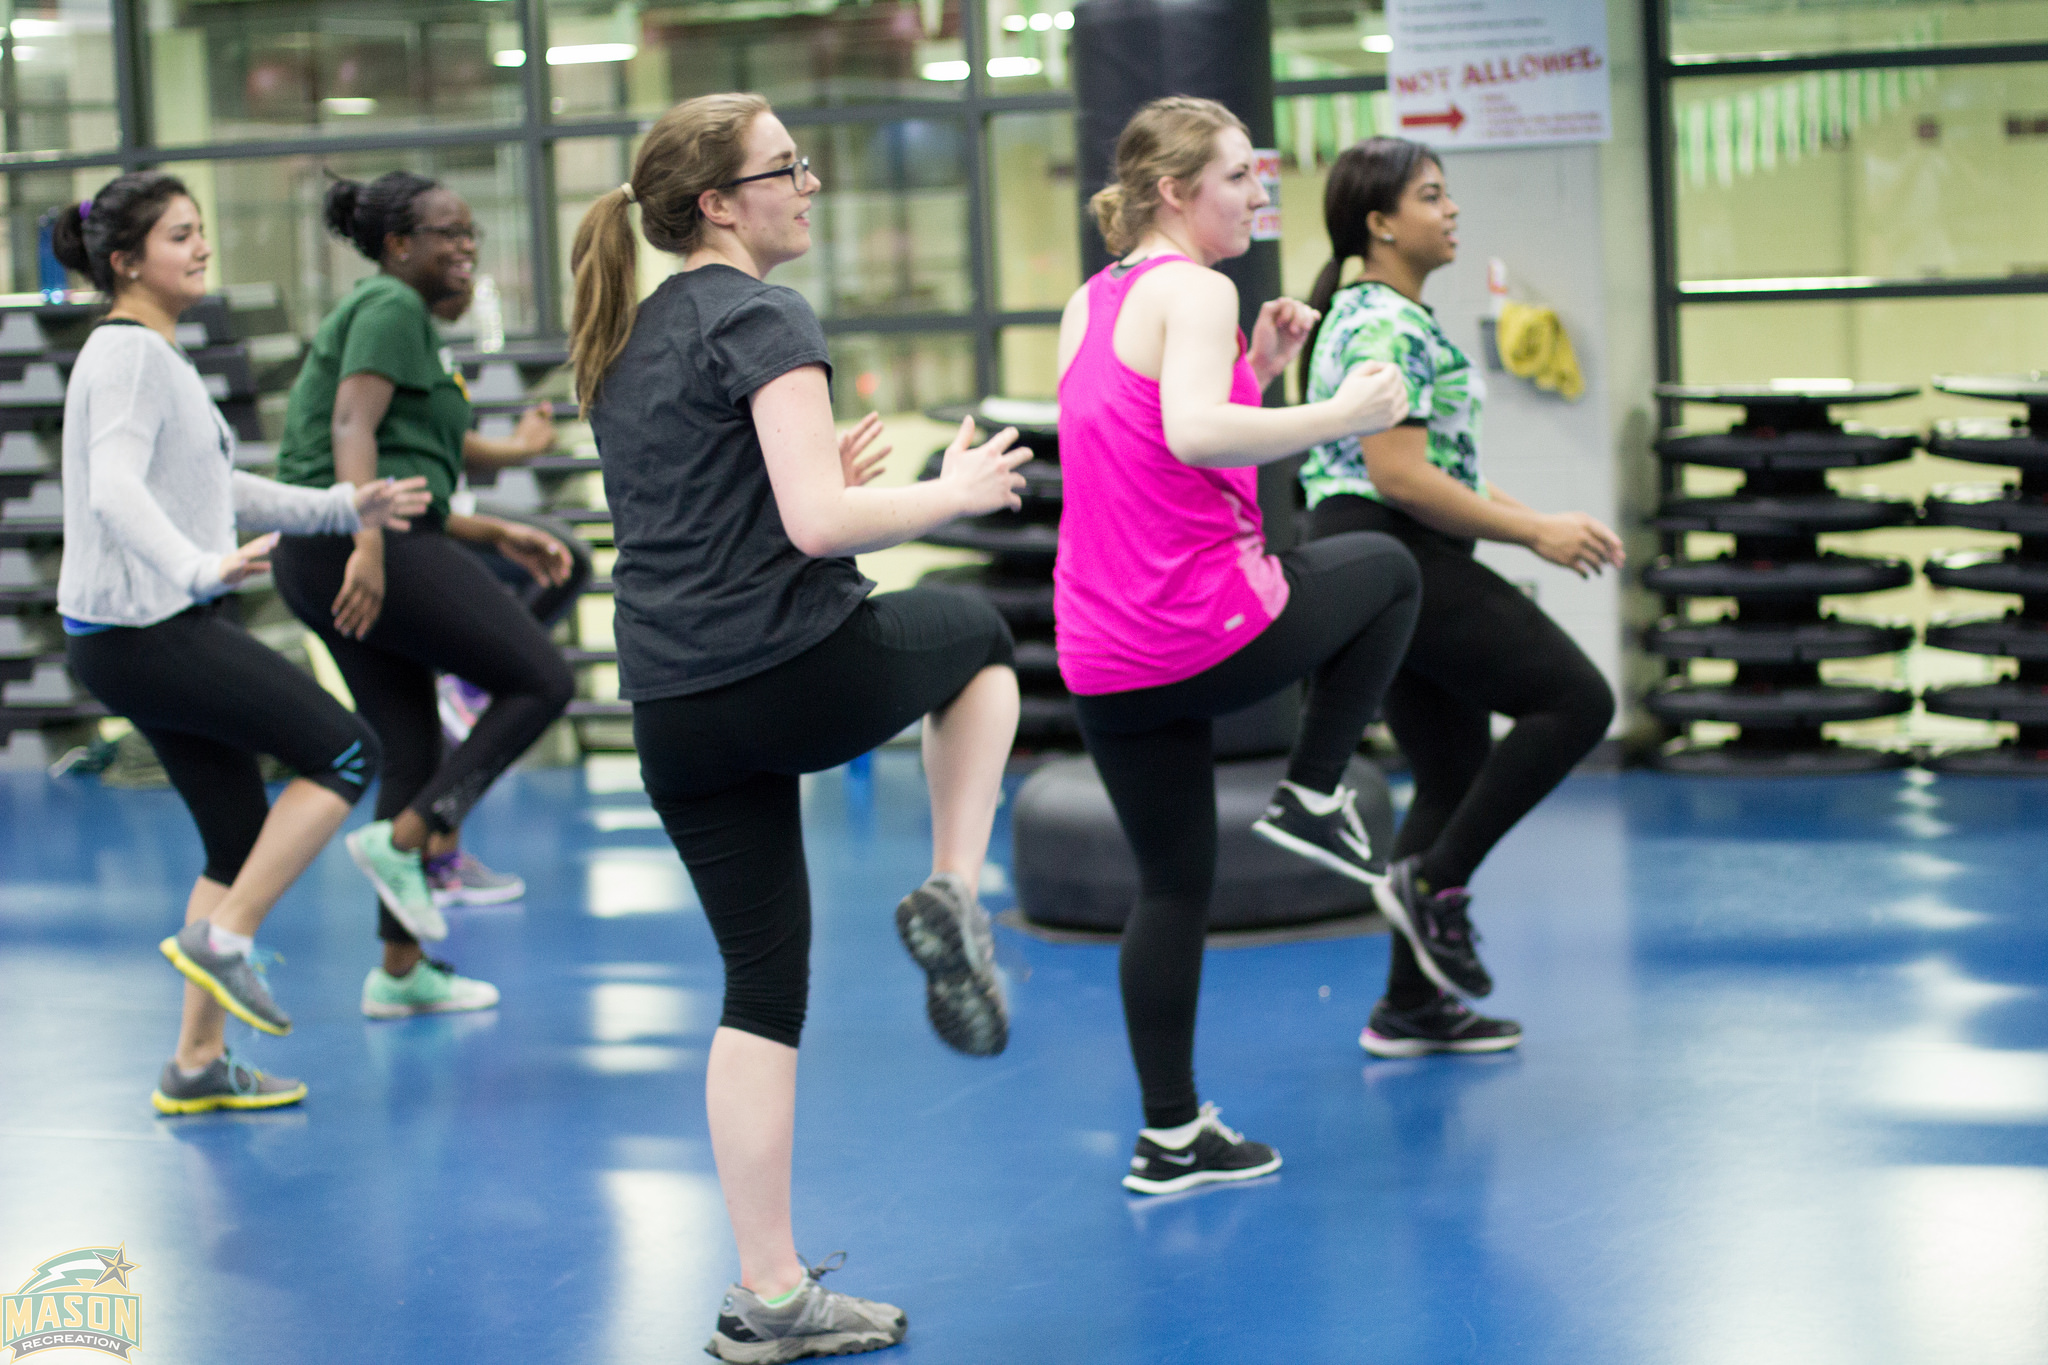
Have you heard of the Zumba® program “Ditch the Workout, Join the Party”? Either at home or in group fitness class, Zumba®’s popularity continues to skyrocket. Mason Rec’s Zumba® classes continue to draw big numbers semester after semester. Have you tried it? If so, great! Keep coming! If not, why? Do you feel you have two left feet? Are rhythmically challenged? Will look silly? So what! Come anyways. I did, and I’ll admit, it was fun.

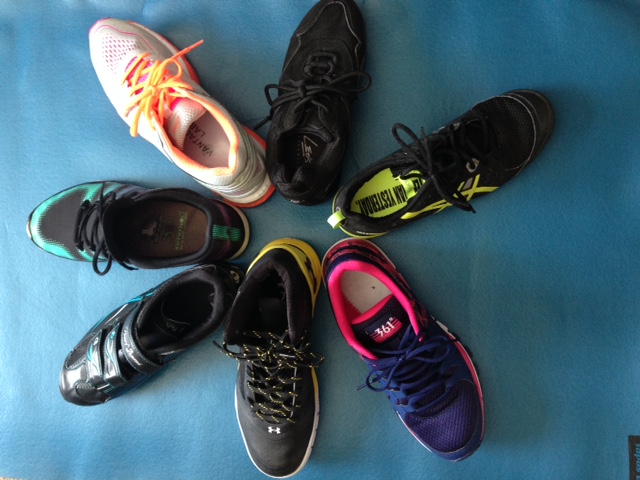
A little background on me: I can keep a beat. I’ve taught group fitness for more than 13 years and can do fancy step choreography. But I feel like I look very, very silly trying to do Zumba®. I may or may not look as silly as I think (I really don’t want to know), but I decided I needed get out of my comfort zone and give Zumba® a try. For me, the key is finding a spot where I can’t see myself in the mirror. You might do better at a spot where you can see yourself—just find what works for you. Wear comfortable workout clothes. You should be able to move freely. Ideally, you should wear workout shoes with lateral support—think cross trainers more than running shoes. If you have access to dance sneakers, they’re your best bet.

The great thing about Zumba® is you can be you. The instructor demonstrates the moves, but you make them your own. If you don’t want to pivot, you don’t. If you don’t want to shake your hips, you don’t. If you want to let loose, you can. If you want to jump around like crazy, you can. As long as you’re keeping it safe, it’s your choice how you interpret each move, and suddenly the hour does feel more like a party than a workout.

Diary of a Fit Patriot: Boot Camp

By Alison M. Hall

Boot Camp is one 24529460280_4444466912_kof Mason Recreation’s most popular classes. We have been offering it at 6:15 am for the past few years, and new this semester we are offering it at 2:30 and 5:30 pm. Boot Camp is for everyone! No matter your fitness level, the instructor will show you how to make each exercise appropriate for you. Several of our boot camp instructors offer descriptions of their classes:

Noki: Come join me at 6:15am for a fitness Boot Camp! It’s a combination of HIIT, strength training, and kickboxing! The music will pump you up and the energy is contagious! All skill levels are welcome–get ready for a great workout!

Jennifer: For my Boot Camp class I LOVE to do Circuits, it’s kind of my big thing that makes my classes ME. We team up in groups and complete different circuits around the room. Each station is a different challenging activity focusing on different muscle groups. The stations really get you out of your comfort zone and push you. Some of the stations are totally different from what you would usually do in a regular fitness class. We use things such as the battle ropes, weighted bars, and I’ll even bring in some scooters from time to time for ab exercises. My favorite thing about teaching my 6:15 am Boot Camp in particular is the community feel. You become a part of a dedicated group of people striving to improve themselves and start to feel a part of something bigger than yourself. You will be challenged, encouraged, and connected as we do fun plank races, sprints and other creative workout challenges together. It’s hard to get up that early at first, but once you do, you will feel amazing and there will be no looking back. If you are looking to really challenge yourself, I think our Boot Camp classes are the best place to be.

Jen S.: What better way to start the week than with a high intensity interval training class! Monday’s Boot Camp consists of 30 second to 1 minute drills that focus on agility, cardio enduranc,e and strength training. The constant change in movement challenges the body and mind and keeps class interesting as the drills are continuously changing.

Check Mason Recreation’s Boot Camp schedule online, and we’ll see you in class!

Diary of a Fit Patriot: Try Something New

By: Alison M. HallIMG_0819

When is the last time you tried a new fitness activity? Did you try bubble soccer when Mason Rec had it on the RAC field? Have you tried the tread climber at Skyline yet? What about open climb at the EDGE at Mason on the Science and Technology campus? Stand-up paddleboarding? Backpacking? Intramurals? Parkour? Racquetball? I could go on and on. I dare you to try something new!

I have done several of the above: climbing at the EDGE at Mason, stand-up paddleboarding, parkour, and racquetball. I was pretty scared trying all of them, but here I am living to tell the tale. They all were outside of my comfort zone. I climbed at the EDGE at Mason as part of a class project I had to do about a fitness activity I knew little about. I thought stand-up paddleboarding looked cool, so when I had the chance, I gave it a try (with my extended family watching me fall in the river a few times). My dad convinced me to play racquetball with him. A friend convinced me to try parkour because she loves it 23141570656_3ac95f7bc8_kso much. There are many reasons to try something new.

My challenge to you is to find something at Mason Rec to try for the first time. It can be something that doesn’t take much planning like your first Zumba, Cycle, or Boot Camp class. They’re FREE to full-time students and Mason Rec members. Another option is take the plunge and pay for one of our martial arts or self-defense classes such as Capoeira or Krav Maga. It’s only $8 drop in to give it a go, or unlimited classes are half-price now. If you are a planner, sign up for an Outdoor Adventures trip this spring. There are many to choose from. You also could commit to playing on an intramural team. If you don’t have a whole team together, Mason Rec lets you sign up as a free agent, where you can either request to join a team or a team can find you.

Bringing it back to Mason Fitness, if you see a piece of equipment at the gym that looks interesting to you but you don’t know how to use it, you can sign up for a free equipment orientation. We will teach you how to use any piece of fitness equipment in our buildings for free. If you want g24825292495_0afc2fb718_kuidance on how to put that equipment in a workout, sign up to work with a personal trainer.

You won’t regret trying something new. Even if you really don’t like it, now you know, and you can move on to trying something else. I promise, I will try something new too before the end of the semester.

Diary of a Fit Patriot: BOSU: Balancing Fun & Fitness

By: Alison M. Hall

24731511091_65bf8887d3_kWhat is that strange mushroom-top looking blue thing you see in the group exercise room, stretch room, and fitness floor? It’s a BOSU Balance Trainer. BOSU is an acronym for Both Sides Utilized. David Weck introduced this half-dome piece of fitness equipment in 2000. Stories told at fitness conferences say he fell from standing on a stability ball injuring himself one to many times, so he cut it in half and created the BOSU. (PLEASE do not stand on a stability ball!) I don’t know if the story is true or not, but I’m glad the BOSU came to be, because it’s a great piece of fitness equipment.

BOSU for Cardio

The BOSU can be used dome side up for a variety of cardio activities. It can replace a step for steady-state cardio classes. The reactive dome, however, makes the workout much harder than using a regular step, so expect to tire out more quickly. The dome also can be used for high-intensity cardio intervals. You can do step-type activities like basic up and down, across the top, straddle, dome toe taps, etc. Most people find it more fun to jump on it. You can power onto the dome from the floor, power across it, or just jump on top. You can use one BOSU, two at a time, or set up a line and jump down them like Marlin and Dory on the jellyfish in Finding Nemo.

BOSU for Total-B24707125422_cd78871b92_kody Strength

Both sides of the BOSU can be used for strength training. You can stand on the BOSU with one foot or both feet on the dome to challenge balance while doing traditional dumbbell strength. You can do pushups with hands or feet on the dome or platform, squats on the dome, lunges with the front foot or back foot on the dome, or lunges with your back foot on the platform side and front foot on the floor. (BOSU advises against standing with both feet on the platform side.) It also is a great core trainer. Many yoga and Pilates moves can be done on the dome or platform side, including plank, v-sit, crunches, and bridge lifts.

BOSU for Balance

Anything you do on the BOSU challenges your balance because of the unstable surface. You can challenge your balance more while standing on the dome by moving your gaze left to right or up and down, standing on one foot, or by closing your eyes. Start slowly if you are not used to balance training.

Always work out in a safe environment. If your BOSU gets sweaty, wipe it down. Make sure no equipment is on the floor near your BOSU. You can find some crazy videos online of super fit athletes doing amazing things on the BOSU—some safe and some not-so-safe. To be safe, BOSU.com and BOSU’s social media pages have video clips of recommended exercises using good form. If you still aren’t sure, take a class or work with a personal trainer to learn proper use.

Diary of a Happy Yogi: Headstands

By: Ashley WhimpeyUnbound straight leg

An inversion in the air is a gross layer of smog from car and factory exhaust that can’t raise up and away. An inversion in yoga is putting your head below your hips in a lovely, brain blood flow stimulating experience. Such a large definition means there are lots of options for inversions: handstands, downward dog, shoulder stand, or—often regarded as the epitome of yogic lifestyle—the headstand.

Of course, yoga is about much much more than standing on your head. It’s about balance on and off the mat, wholistic self appraisal, third person objectivity in evaluating your life, flow, flexibility, etc.

Regardless, the appeal of a headstand is potent. Many people are afraid of a headstand, or being upside down in general. It’s intimidating and unfamiliar. However, overcoming the fear is something that’s worthwhile for a few reasons and can be done safely with a few things in mind.

Benefits of the headstand start with the way it relaxes strain on the heart (which is usually pumping blood up with force) by tipping everything the other direction. It slowly invigorates the body and rushes oxygen-rich blood through the upper part of the body (especially to the brain). There is an increase in stretch on the legs, and a slight stretch on the thighs and feet in particular. Said to “harmonize blood circulation,” getting upside down is physically very rewarding. Let’s also mention headstands have been used to treat rotator cuff tears.

A headstand is rewarding in psychological, spiritual, and emotional ways as well. The literal idea of flipping the perspective is a wonderful metaphor for a lot of difficulties. Conquering fears is good for increased resiliency and well-being. Mastering the “king of asanas” can make any yogi a little more confident in their journey.

Even with all this good knowledge, there are some safety considerations. When a headstand is done wrong it can damage the spinal cord, twist the neck, disrupt blood flow, or put a nice little bruise on the top of the head. These things mainly come from misguided practice techniques, however, and if safely instructed and slowly built up to, a headstand can be for literally anyone. Just Google “84 year old does headstand.” I’ve personally witnessed a 67-years-young woman (having begun a yoga practice at age 65) master the headstand.

Tips and tricks to be awesome in headstand (safely):

  1. Start small. Just sit with your head on the ground and your legs in a pike position, slowly bringing your hips up over your head – toes still on the ground. Get familiar with the “stacking” of the body into a line.
  2. Put your elbows at 90 degrees. They should be directly in front of your shoulders, fingertips facing your face. Too many people let their elbows flare out and don’t keep the 90 degree rule, so they disrupt the three-point advantage of keeping your head and wrists down.
  3. Try a bound headstand. Interlace your fingers and place them behind your head. Squeeze your forearms into your head and use the entire distance (from wrist Bound headstandto elbow) to equally press down and support yourself on the ground.
  4. Raise both legs together. This is shown to decrease the load put on the back that is induced by lifting one bent leg and then the other. It requires more core strength, so that will need to be built up first.
  5. Lower one leg down at a time. Unlike coming up, when coming down it’s best to then move one leg at a time for the same reason – decreased loading on the spine. You’re already all stacked up, so carefully come off of that.
  6. Name check. You should be able to say your own name comfortably. If you can, you are in alignment. If not, come down and work on building back up.
  7. Relax your grip on the mat. Digging in your fingertips simply increases the chance of losing focus and of falling out to one side or another. It’s not recommended to begin practicing headstands on the grass because of this tendency. If the ground is relatively flat and you can restrain from pulling on the weeds, it can be a good idea.
  8. If you do fall: tuck and roll. Chin into chest, knees to stomach.
  9. Avoid headstands if you have hypertension, recent back surgery, ocular hypertension, or if you are currently pregnant or menstruating.
  10. Be willing to try something new. Believe you can and you can. Believe you cannot and you cannot.Unbound bent knee


References:

Hector, R., & Jensen, J. L. (2014). Sirsasana (headstand) technique alters head/neck loading: Considerations for safety. Journal of Bodywork and Movement Therapies.

Narasimhan, A., & Prasad, M. G. (2012). The role of Yoga-Asanas in Mind-body Harmony.

Diary of a Fit Patriot: Shoes!

By: Alison M. Hall

I’ve been asked, “Do you pick up new fitness activities just so you can buy new shoes?” No, I don’t, but it’s an added perk for a shoe-lover like myself. While I like the look of heels as much as Carrie Bradshaw, I own maybe 3 pairs, and I cannot walk smoothly in them. But I own more pairs of fitness shoes than I can count. I’ve inherited my dad’s bad feet, so I’m careful to have proper footwear for each activity. Here are some shoe options for basic fitness activities.

Cross Trainers: It sounds great, a shoe you can wear for everything. Well, almost everything. Cross trainers are great for most group fitness classes, fitness drills, cardio machines, and basic strength training. A good cross trainer is built up more around the ankle for extra support for lateral movement. Some people can wear them fine for short runs, although I’m not one of them. If you only want to buy one pair of gym shoes, cross trainers are your best bet.

Running Shoes: We runners can be very particular about our shoes because running is a lot of impact on the feet. Getting fit for the right pair of running shoes is important because different foot strike patterns require different shoes. A gait analysis in a running store can tell you if you pronate (turn in), supinate (turn out), or are neutral (neither). There are running shoes for each of those gaits. You also can chose minimalist if that’s your preference, trail shoes if you run off road, or extra-reflective shoes if you run at night. Ideally you should get a fitting at a running store. Once you know your proper shoe, you can try to find your next pair at a discount online.

Walking Shoes: Yes, walking shoes are different than running shoes. When walking, your body’s weight is distributed more evenly on your foot than when running. Walking shoes are designed to work with body mechanics and the rolling foot strike of walking. While just about any sneaker is fine for walking to class, if you walk many miles, consider a walking-specific shoe.

Cycling Shoes: You don’t need cycling shoes to participate in cycle class, but if you do it a lot, you might want them. Cycling shoes have a much stiffer sole than regular sneakers. You are supposed to push the pedal with the ball of your foot, so if your shoe has a soft sole, your foot bends. That can put pressure on your foot and reduce the efficiency of the pedal stroke. Some cycle shoes also have the option to slide in the toe cage or clip into the pedal. If you shoe clips in, your pedal stroke is even more efficient because remember, you both push and pull. As you pull, your foot stays secure to the pedal giving you more power. Clipping in also helps you keep alignment, which will save your joints the longer you ride. Our bikes use SPD compatible clips.

Studio Shoes: If you take group exercise a lot or do lots of high impact cardio drills, consider studio shoes. They give even more ankle support than cross trainers and offer more cushioning in the heel and forefoot for the impact.

Dance Shoes: Zumba is hugely popular on campus. It’s fun, upbeat, and sometimes doesn’t even seem like exercise. Because Zumba is more dance than aerobics, dance sneakers are a good option. They have a smoother sole, so pivots and shuffles can be done with less risk of twisting a joint or your foot getting stuck on the floor. They are breathable, light weight, and have a wider sole for stability.

Weightlifting Shoes: If you are a power or Olympic-style lifter, you might want weightlifting shoes. Weightlifting shoes don’t absorb force like running shoes or cross trainers. They instead let you use the force your body produces to lift more efficiently. Also, the heel is raised, which can help you increase your ankle range of motion as you do this style of lifting.


Diary of a Fit Patriot: Journey To a Half IronMan Triathlon

By: Alison M. Hall

I promised in an earlier post that I’d write about my crazy adventure competing in an IronMan 70.3 Triathlon. My friend only agreed to run a marathon with me if I would sign up for the EagleMan IronMan 70.3 with her. A 70.3 triathlon is half the distance of a full Iron-distance race. The distances are a 1.2-mile swim, 56-mile bike, and 13.1-mile run. When she proposed this idea, I had already done several sprint-distance triathlons. I knew I could run 13.1 miles. I figured I probably could work up to biking 56 miles. But I figured neither mattered because there was no way I could swim 1.2 miles in open water. However, eventually I gave in and signed up. EagleMan is in Cambridge, MD, and takes place in early June. The training plan I used was 20 weeks, so I spent late winter and almost all of spring training. Here’s an overview of each part.

Swim Training

I took swim lessons as a kid and knew pretty much what to do, but I wasn’t technically efficient and I wasn’t fast. I never had swum more than 1K (.62 miles) and I hadn’t been a pool in almost six months. I tried to be smart with my training and I started slowly, swimming the longest 20 minutes of my life the first time out. I gradually increased the time and decreased the misery in the pool. Some swims were endurance—swimming lap after lap with little rest. I’d stop every few hundred yards for a drink, but that’s it. Some swims were designed for increasing speed, so I’d swim short distances fast, rest, then do it again. And some swims were designed for technique, doing drills using flippers, pull buoys, and paddles. I also worked with a swim coach for a few weeks to strengthen my technique, which helped a lot. By the end I could swim more than the 1.2 miles needed, and I did a 1-mile open water practice swim a few weeks before the race.

Bike Training

I teach group cycle classes, so I was at home on a bike—or at least a bike that doesn’t go anywhere and doesn’t tip over. A road bike is pretty different! I didn’t have a fancy tri bike, so my old road bike had to do. Almost all of my rides in the first half of training were inside. I set my road bike up on a trainer, and sometimes I rode to music, others to cycling DVDs, and others while watching movies. I put aerobars on my road bike so I could practice getting in the low aerodynamic position. When it finally was warm enough to go outside, I did short rides around home and the long, long, long (up to 60 miles) rides on the W&OD trail with my friend.

Run Training

I wasn’t too concerned about training for the run because I had done that much running before, although never after that much swimming and biking. The plan had a few shorter runs throughout the week with one progressively longer run on the weekend. I didn’t worry about speed at all as I got the runs in. My longest was 12 miles.

Brick Workouts

The long swim, bike, and run days usually only had one workout. But the other days had a swim in the morning and run later. Or bike in the morning and swim later. Or the hardest, bike and run back-to-back, which is referred to as a brick workout. The main point of the brick is to prepare you to run on tired legs. So the bike parts are long while the run parts aren’t. The run parts, however, are pretty rough because the legs are tired from the bike. Most weeks had one brick workout.

Race Day

I was very nervous on race day, but then the swim was easier than I expected. Fortunately we had the current with us for most of the course. I got bumped quite a bit as many, many swimmers passed me, but nothing bad, and I finished feeling tired but okay. The bike was long. I mean really, really long. I again got passed a lot, and I was alone a lot on the course.  I was miserable by the end, but I finished. The run was hard. I mentioned this race was in June—it was 92 degrees with high humidity by run time. By the time I got to the snow cone machine at the halfway point (which I had been looking forward to for hours), it was empty. I got tons of ice and water at every station to keep me cool. I walked a lot more than I planned to, but I made myself run the last mile with no breaks, and I finished happy.

Finishing that race was a huge accomplishment. If you’ve done a few shorter triathlons and Screen Shot 2016-02-15 at 1.09.11 PMwant to make the jump to longer distances, go for it. You have to be dedicated and you have to be good at planning your days, but you CAN do it. If you haven’t done a triathlon but think you might want to push yourself to this level, you still should go for it. Most experts recommend doing at least one shorter tri before a long distance one. There are many races in our area, plus Mason Rec hosts the Indoor Triathlon February 27.

If you’re wondering, I did finish EagleMan again the next year, but I’ve only done sprint distances lately. I do have the dream of a full IronMan, so whenever I fulfill that even crazier dream, I’ll be sure to write about it too.